Page Templates
Overview
Templates can be used as an alternative means to create documents, specifically for multiple documents that share standard format and content. The Source Editor and Page Builder provide tools for creating and refining complex document pages; templates expand upon that to make document creation faster and enable bulk document loading (requires some Runbook development to accomplish).
A Resolve Actions Pro template consists of two parts: a data entry form that defines all field values that need to be input, and a template document page that serves as the model page for future copies. When creating a document using a template, the user is prompted to enter appropriate information in the form, then that information is used to populate the corresponding fields in the template document page to create the final page. To use a template, go to Main Menu > Development Tools > Page Builder.
In the "Add Document" dialog box, enter the full "Document Name" (both namespace and name) and then choose the appropriate template from the "Templates" drop-down field to apply to the document page, as well as choose or enter the namespace to create the page in. The "Document Name" is used to create the final document page.
In the template form, enter all the required fields. The data that is input into the template form fields are inserted into the respective fields matched in the template page. The "Document Name" entered in the "Add Document" dialog box is actually the first field values for the template, and is used to populate the "Namespace" and "Doc Name". The final template document page can be further edited, just like any other document wiki page, with either the Source Editor or the Page Builder. The template page differs from other pages only with its use of fields that allow various inputs to change the field values, and thus the page content.
Creating Templates
Templates provide a means to create a consistent look and feel for knowledge content (document wiki pages). The layout design and the content fields present in all documents using the template should be prepared before template creation. To create the actual template, go to the Template Definition item in the Wiki Administration menu. From the "Templates List", select New to create a new template or click on the More Information icon to edit an existing template. If modifying an existing template, it is best to Copy the old template first and edit the copy to create the new template. Notice that the "Templates List" shows the Wiki and Form names associated with each template (remember that an Actions Pro template consists of a data entry form and a template wiki page).
To create a new template, enter the template Name (only alphanumeric characters and the underscore "_" are allowed). Add the appropriate roles to denote users allowed to access the template. Click the "Back" button to exit back to the "Templates List", or choose "Save" to create the template.
After saving the template, notice that Actions Pro automatically creates the data entry form and template wiki page that comprise the new template. The form and wiki page names include the prefixes "TPL_" and "Template.", respectively, added to the template name, and those names cannot be changed. To finish creating the template, the form and wiki page need to be built (preferably the template form before the template wiki page). Click the More Information icons to continue and edit the template data entry form and wiki page.
Template Form Definition
To complete the creation of a template, the template data entry form must be built. The template form is one-half of a complete template (the other half being the template page). The Form Editor to create the template form can be accessed by clicking the form link for the template in the "Templates List" or clicking the More Information icon next to the "Form Name" in the template edit screen. Alternatively, the Form Editor can be accessed directly through the View Forms item in the Table Administration menu. In the resulting "Forms List", click the More Information icon next to the desired form to bring up the Form Editor for that form.
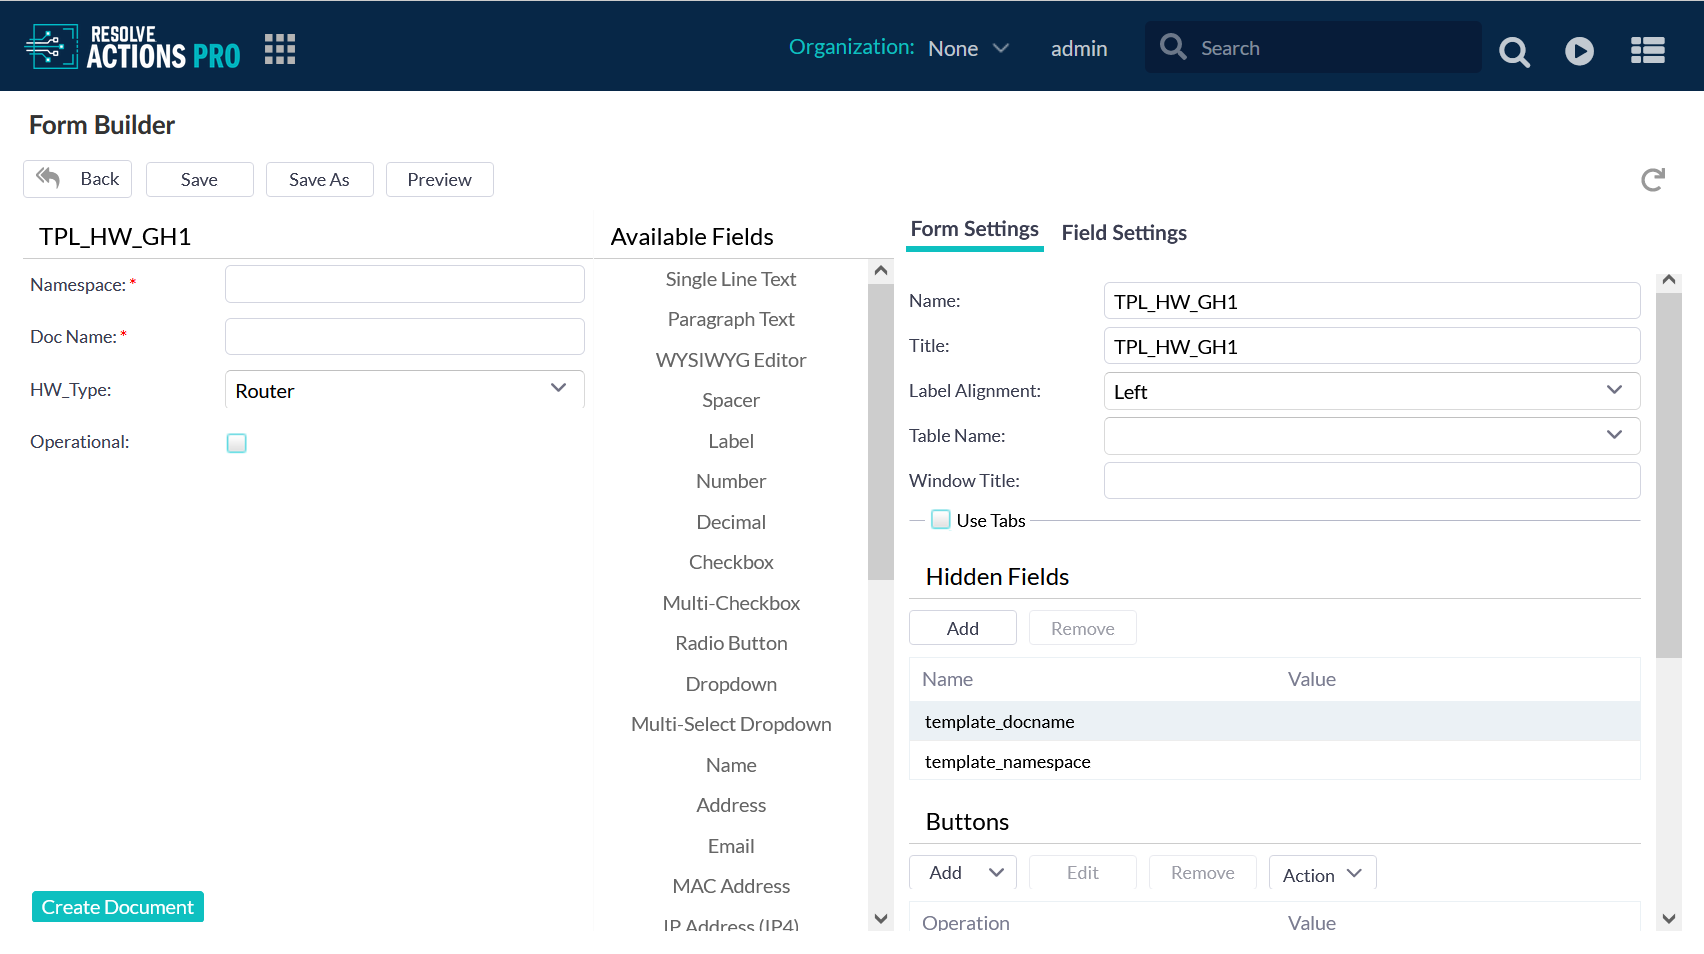
- The Form Editor allows you to specify the number and types of fields to be displayed in the final document page (to be filled in by the page viewer). The editor screen has three panes. The Fields List shows all the fields added to the form by name with a default value. A field name can be changed by double-clicking on the name in the Fields List or configured in the Field Settings for that field. A field can be removed using the list. The order of the fields can also be changed by dragging fields around into new positions. "Namespace" and "Doc Name" (for the newly-created document page) are required when using the form and are automatically filled with the name entered in the "Add Document" dialog box.
- The middle pane of Available Fields lists all the various field types in Actions Pro. Each field type will have different possible settings that can be configured. Click on a field type to add a field of that type to the form and Fields List.
- The Settings pane on the right toggles between either the Form Settings options for the entire form, such as the addition of buttons or access rights to set roles, or the Field Settings for the currently-selected field.
When adding a field to the form for the first time, the Settings pane will switch to display the Field Settings for the new field. Some common configuration options are the "Field Name", "Field Label", "Label Alignment", and "Read Only"/"Hidden"/"Required" settings. The "Field Label" will auto-fill as you type in the "Field Name", but they are not required to be the same. The "Field Name" is the reference for the template document page and can only contain letters with no spaces, while the "Field Label" is what the template form will display when prompting the viewer for input and has no such limitations.
The various types of menu option fields (checkbox, radio button, drop-down) share the same interface to set menu options. Some configuration options will differ between field types. For example, a text field has a maximum allowed character length, while a number field has a maximum allowed numerical value.
Notice in the sample form above, the field "Sample Image" is a field of the type "Single Line Text". The intent behind the "Sample Image" field is to allow the viewer to attach an image during document creation by typing in the {image} wiki mark up (which is text) into the field box. This naturally requires an image file to be attached to the document page, which can be done at a later step.
The Preview option displays what the current form would appear given the current state of the interface: thus, it will preview any unsaved changes before the user commits to them. The executable "Create Document" button in the "Preview" dialog box will create the form if the required namespace fields are filled. Select Save in the Form Editor to save the form plus any new changes, otherwise the changes will be lost. The resulting "Preview of Changes" dialog box lists any revisions to the previous version of the form. Select Save again to finalize and create the form.
Template Page Definition
To complete the creation of a template, the template document page must be built. The template page is one-half of a complete template (the other half being the template form). The template page serves as the model for future document pages created with the template. It contains blank fields, which are filled during document creation with the corresponding values the user inputted into the template form. The fields are the only parts of the template document page that changes with the creation of each new page. To build a template page, edit the template page that was created when the template was first defined. Access the "Templates List" and click the corresponding wiki page link for the desired template, or click the More Information icon for the "Wiki Name" in the template edit screen. The template page can also be accessed directly as with any other document page by typing the full page name in the main toolbar Search field and choosing the Go button. The template document page will have default content already included.
The template document page can be edited just like any other document wiki page with either the Source Editor or the Page Builder. The template page differs from other pages only with its use of fields that allow various inputs to change the field values, and thus the page content. Any field names in the template page will import values from the same field names matched in the template form.
The source code for a template is a combination of wiki markups, HTML, and field names. Calls to the template form fields are simply the field names enclosed by brackets. Wherever the field name calls reside, the template page will substitute the corresponding values from the template form.
Notes about Templates
The complete template is composed of the template (data entry) form and template document page. There is a one-to-one relationship between the form and the page, and both the specific form and the document page must be used for that template. Do not delete either the form or the page! To change or clear a document page, edit or delete all content using the Source Editor or Page Builder. The template, incorporated in the link between form and page, can be re-used.
Documents can be created from within an ActionTask using an existing Actions Pro document template. The following code creates a document titled "Test.CreatedByTemplate" using the template called "Template.myTemplate". It puts content into the fields "Title", "Body1", "Bulleted1", "Bulleted2", and "Time-to-Resolve".
def params = new HashMap();
def template Params = new HashMap();
// Set values to be added to Wiki Document
templateParams.put("[Title]", "Document 1");
templateParams.put("[Body1]", "Body paragraph 1.");
templateParams.put("[Bulleted1]", "Point 1");
templateParams.put("[Bulleted2]", "Point 2");
templateParams.put("[Time-to-Resolve]", "300");
params.put("USERNAME", "admin");
params.put("namespace", "Test");
params.put("docname", "Created Template");
params.put("template_namespace", "Template");
params.put("template_docname", "my Template");
params.put("template values", template Params);
ESB.sendMessage("RSVIEW", "MWiki.createWithTemplate", params);